I recently redesigned my icon gallery sites.
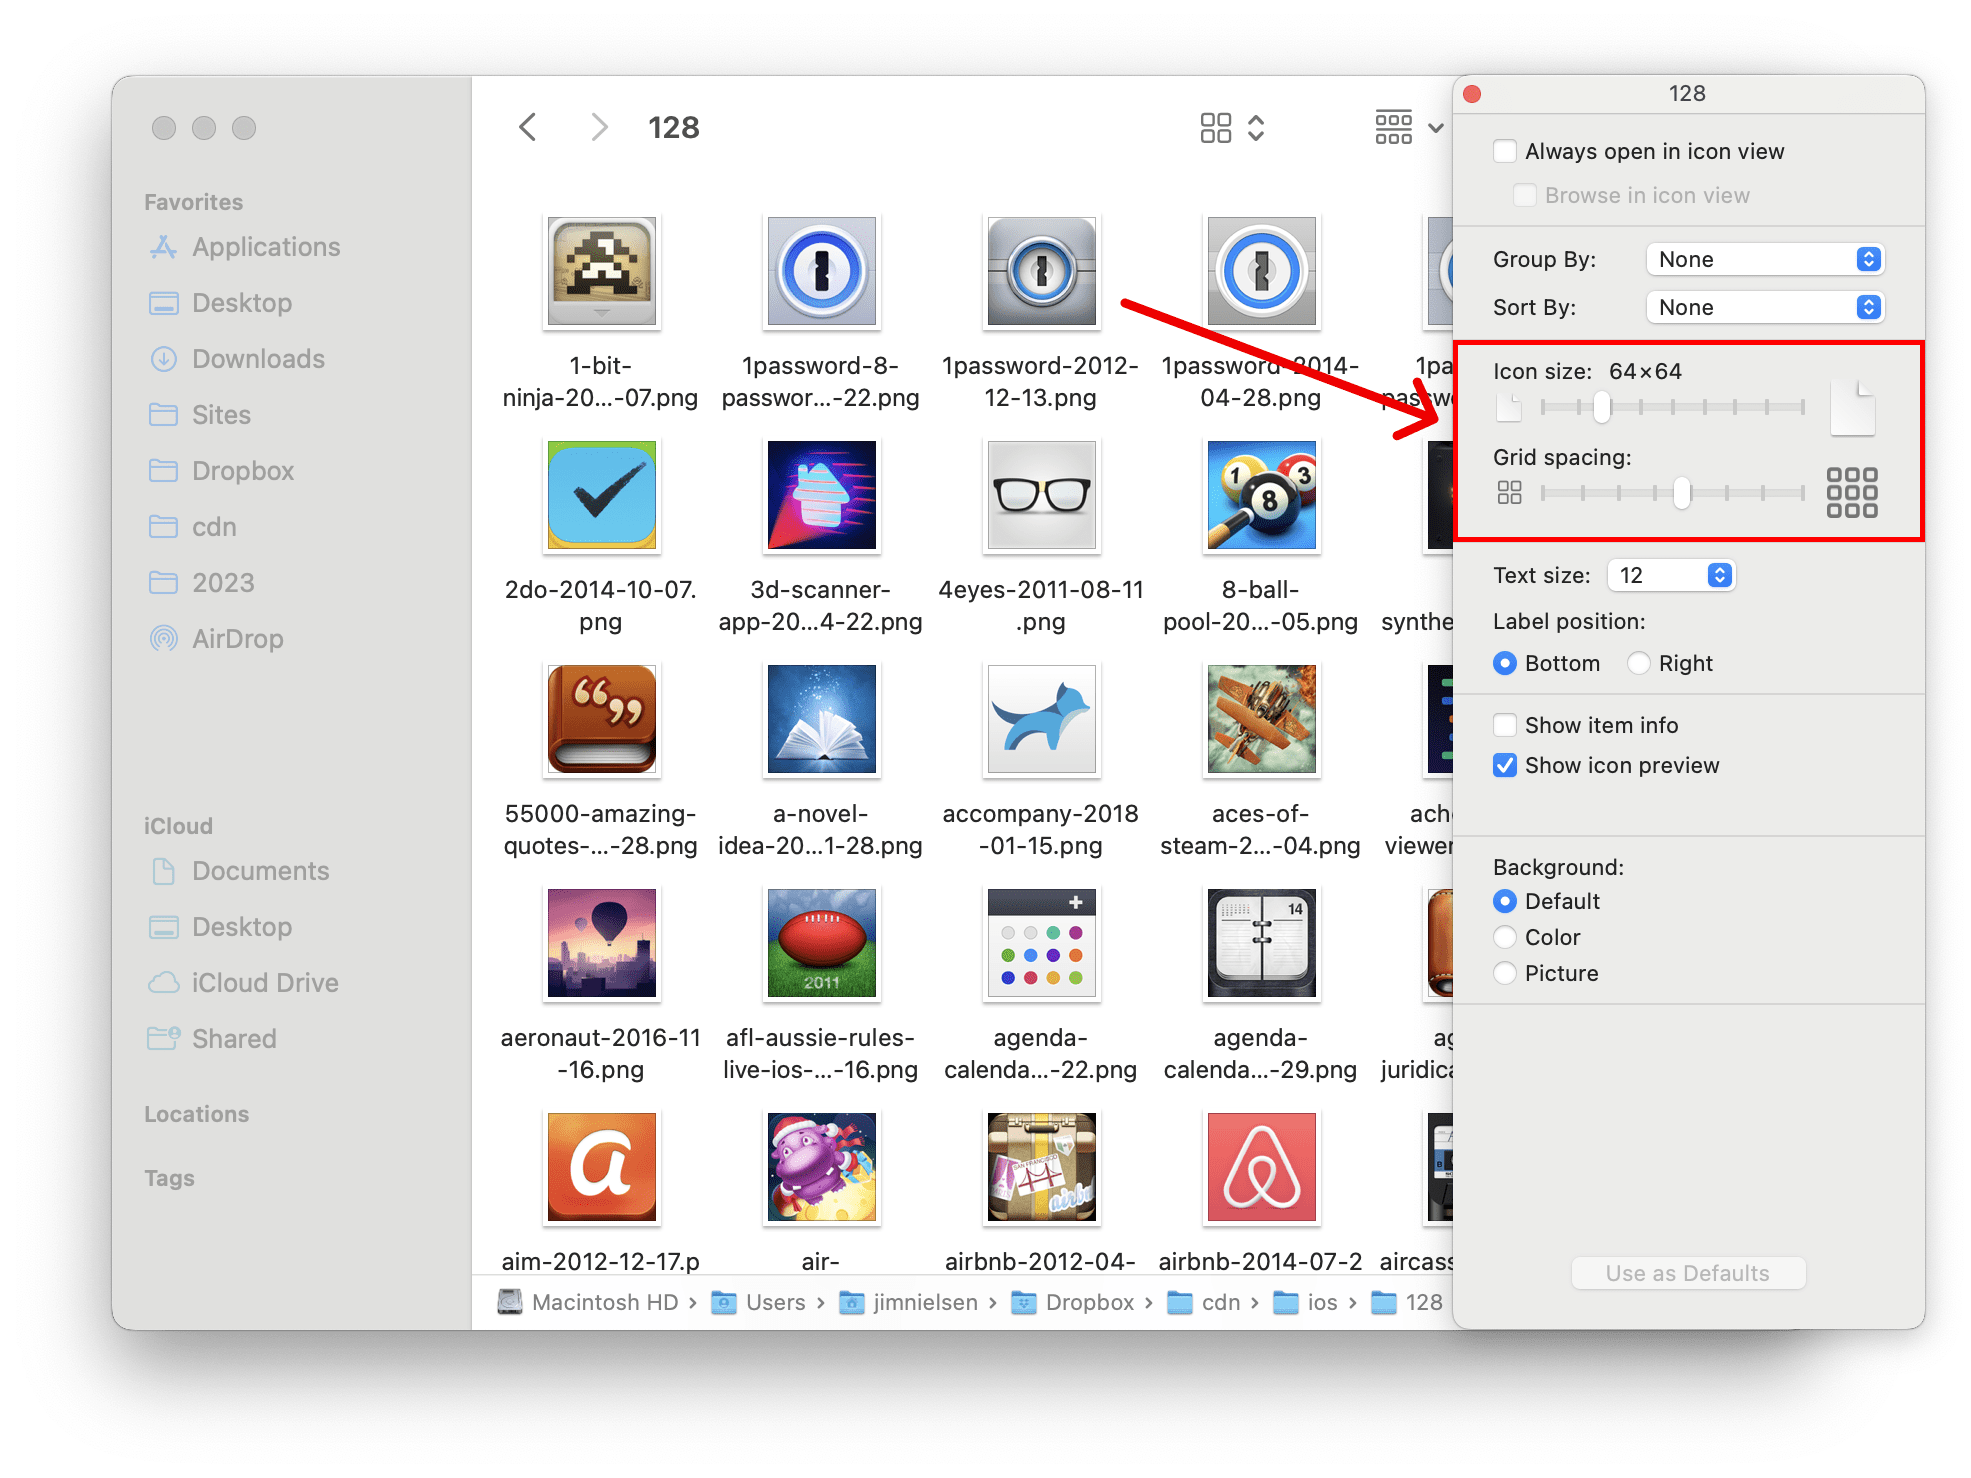
The goal: create a layout that allows you to customize the view around the collection of icons you’re looking at by changing the size and spacing of the grid — sort of like the thumbnail view on macOS finder.

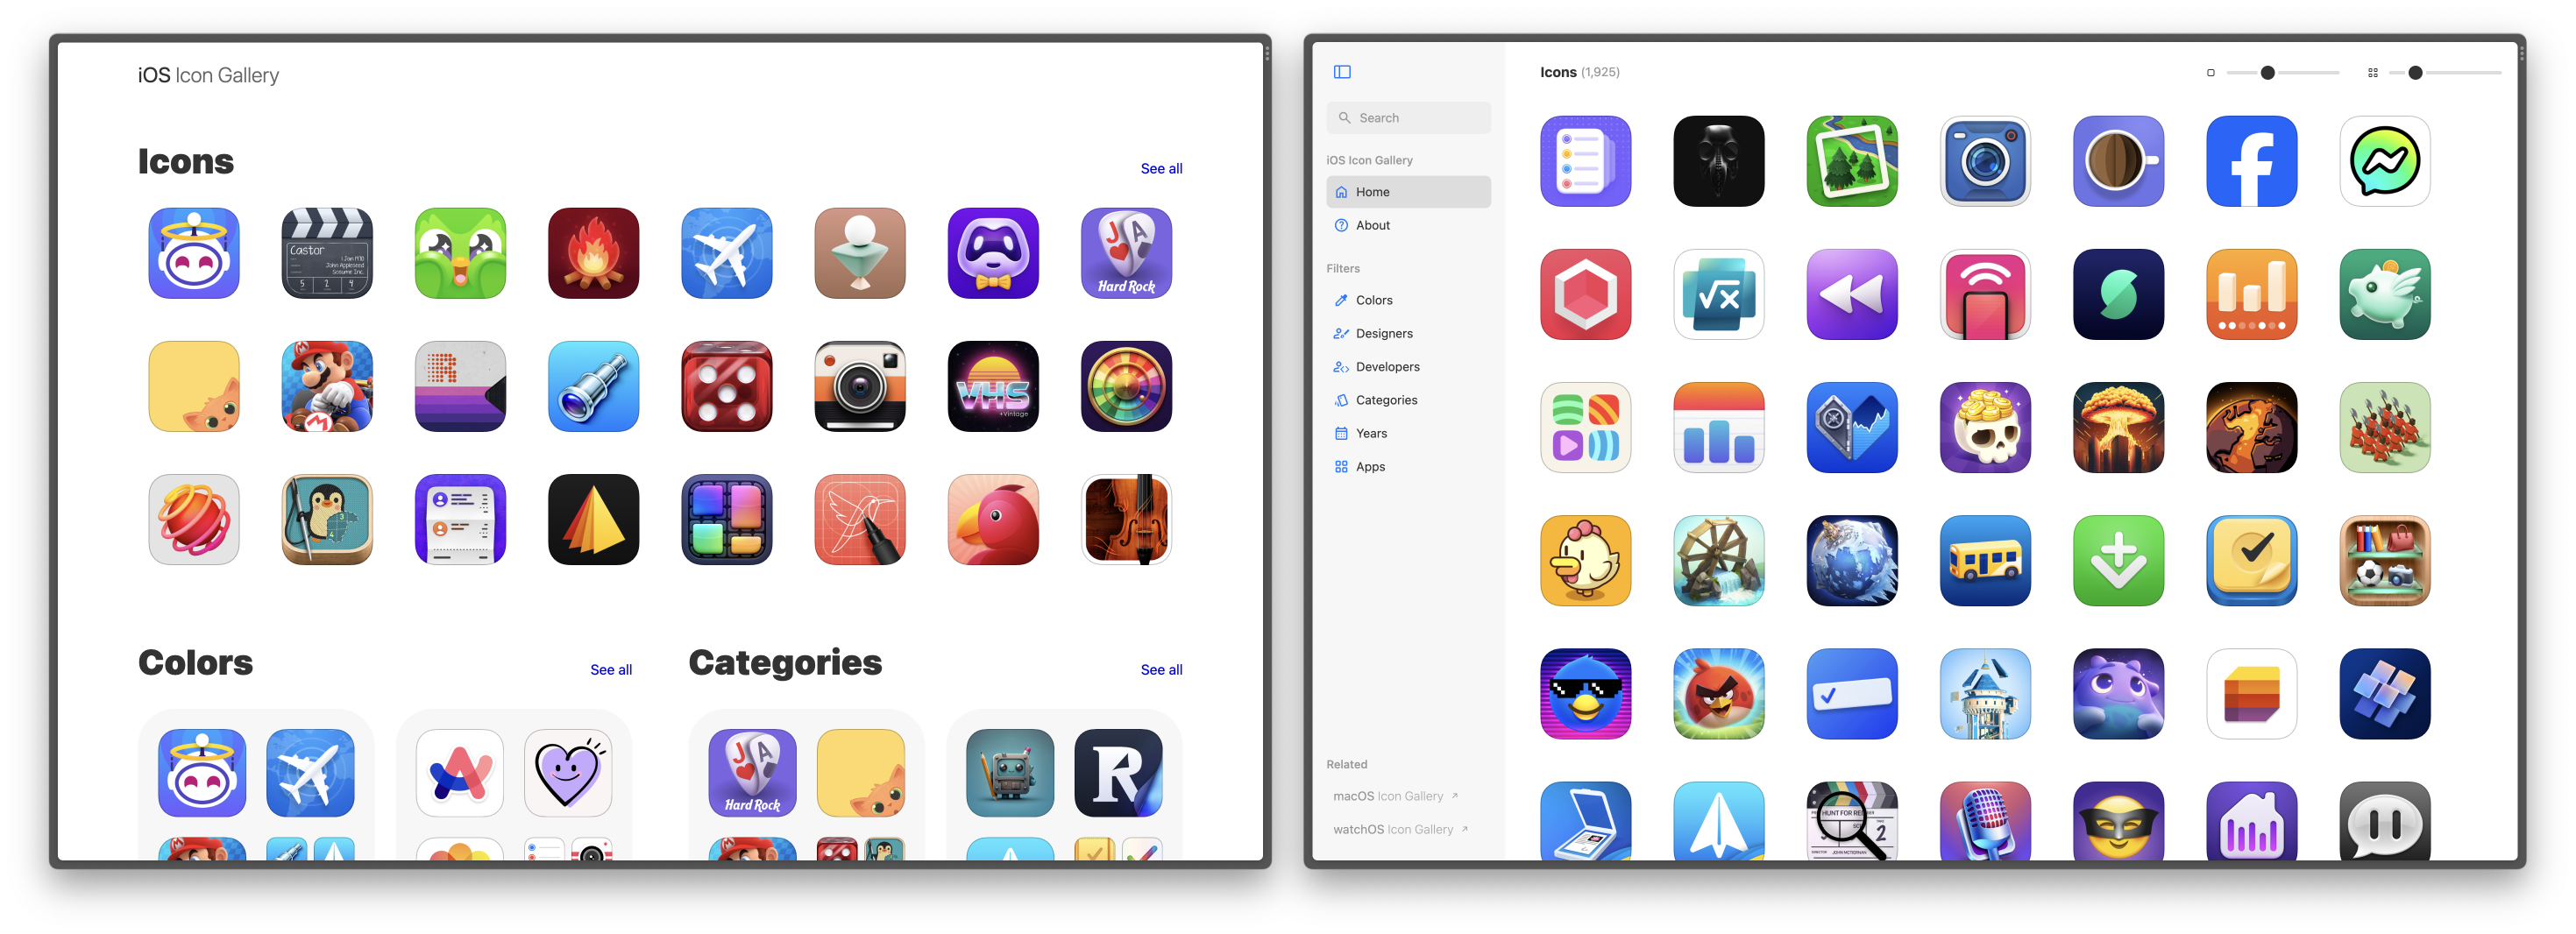
I’m happy with how it turned out. Here’s a side-by-side of the old (left) vs. new (right).

How It Works
The site is powered by an SSG and I didn’t want to change that, which meant all view customizations would be client-side features that directly manipulate the DOM (rather than asking for new, custom HTML from the server).
Here’s how I made it work:
- User asks for page with a bunch of icons
- Server responds with HTML which (by default) displays a grid of icons at 128×128px
- If JS is present, page renders
input[type=range] controls to change the icons’ display size as well as the grid’s spacing. - When inputs change (e.g. icon size from 128×128px to 64×64px), client-side JS re-renders the list of icons by swapping out the
src (and srcset) of each icon's <img> tag and changes relevant HTML attributes to apply the appropriate CSS styles.
For example, here’s what the HTML might look like on the initial page request (generated by the SSG):
<ul class="icon-list icon-list--md">
  <li>
    <a href="...">
      <img src="..." width="128" height="128" />
    </a>
  </li>
</ul>
And when the user changes an <input type="range" /> control, some JavaScript changes the <img> attributes and parent class name (i.e. icon-list--{SIZE}) so the new DOM looks something like this:
<ul class="icon-list icon-list--sm">
  <li>
    <a href="...">
      <img src="..." width="64" height="64" />
    </a>
  </li>
</ul>
As is the case with all real-world implementations, it’s not quite this clean. There are complications.
For example, I use htmx for paginating lists of icons. This fetches the new page’s HTML and inserts it into the current page’s markup (if JS is supported, if not it just navigates to the new page).
Because the static page always comes with the markup for the “medium” sized list icons, I have to somehow know whether the icons are at a custom size and change the markup of the newly-fetched HTML from htmx so it matches what’s currently in the DOM.
I could’ve handled all this in a .js file, but that felt like a bunch of miscellaneous scripts strung together.
That’s when I thought, “What about a web component?”
Icon List as a Web Component
Because I want my site to be progressively-enhanced (e.g. the core feature of the site — viewing icons — works without JS), I didn’t want a “shell” web component that’s merely an empty HTML tag in the initial HTML that later renders everything with JavaScript, e.g.
<icon-list></icon-list>
Instead, I wanted a web component that displays all icons by default and then enhances their functionality with JavaScript (if its enabled) — maybe we need a name for this kind of web component.
What I came up with was markup like this:
<icon-list size="md">
  <a href="...">
    <img src="..." width="128" height="128" />
  </a>
</icon-list>
This is the initial HTML that gets served for every page with a list of icons.
All the styles for this list of icons get delivered with the initial page. They look something like this:
icon-list {
}
icon-list[size="sm"] {
}
icon-list[size="md"] {
}
icon-list[size="lg"] {
}
icon-list[size="xl"] {
}
This allows my custom element <icon-list> to render something useful on the initial page load.
Then, I use JavaScript to inject resizing controls as well as the logic for manipulating the DOM based on those controls. Example:
class IconList extends HTMLElement {
connectedCallback() {
this.insertAdjacentHTML = `
<input type=range name=size />
`;
this.querySelector("input[name=size]")
.addEventListener((e) => {
this.size = e.target.value;
this._renderSizing();
});
document.addEventListener("htmx:eventToListenTo", () => {
this._renderSizing();
});
}
_renderSizing() {
this.querySelectorAll("img").forEach(img => {
});
}
}
customElements.define("icon-list", IconList);
This is a nice approach (over stringing together a bunch of functions in JS file) because it feels more encapsulated. All related logic and DOM manipulations are “under one roof”. Plus it works as a progressive enhancement: if the JS fails to load (or the user has it disabled) they can still navigate through different pages with lists of icons (and the <icon-list> component just works like a <div>). And if JS works, the <icon-list> component acts like a <div> with interactive super powers layered in.
Conclusion
Maybe I shouldn’t be using the term “web component” for what I’ve done here. I’m not using shadow DOM. I’m not using the templates or slots. I’m really only using custom elements to attach functionality to a specific kind of component.
But it still kinda feels like web components. All of this could’ve been accomplished with regular ole’ web techniques, e.g.
<style>
.icon-list {...}
.icon-list--md {...}
</style>
<ul class="icon-list icon-list--md">
<li>
<a href="">
<img src="" width=128 height=128 />
</a>
</li>
</ul>
<script>
</script>
But custom elements give me an organizing principle for my code that allow me to more easily understand and intuit the scope of styles and scripts.
<style>
icon-list {...}
icon-list[size=md] {...}
</style>
<icon-list size="md">
<a href="">
<img src="" width=128 height=128 />
</a>
</icon-list>
<script>
class IconList extends HTMLElement {
}
</script>
I like the logical structure this gives my code. And for the end user, there’s really no difference — so win-win.