Automating My Netlify “Public Folder” Workflow With macOS Shortcuts
I’ve written before about my process for managing images on my blog (and other websites).
In short: I put files in a select, local folder, that folder syncs to a site on Netlify, and all its contents become instantly available on a global CDN.
For example, imagine I have the following folder structure:
.
├── blog/
│   └── screenshot.png
├── other/
│   └── screenshot.png
└── some-image.jpg
That folder’s contents sync to a site on Netlify hosted at a particular domain, in my case: cdn.jim-nielsen.com. Once synced, every one of those files becomes available at a path matching the structure of that folder, i.e.
cdn.jim-nielsen.com/blog/screenshot.png
cdn.jim-nielsen.com/other/screenshot.png
cdn.jim-nielsen.com/blog/some-image.jpg
Like any workflow, this has its benefits and drawbacks. But it has served me well for a few years now.
Recently the idea struck me: why not add a contextual menu item when you right click in the Finder to copy the public URL of any file in this folder?
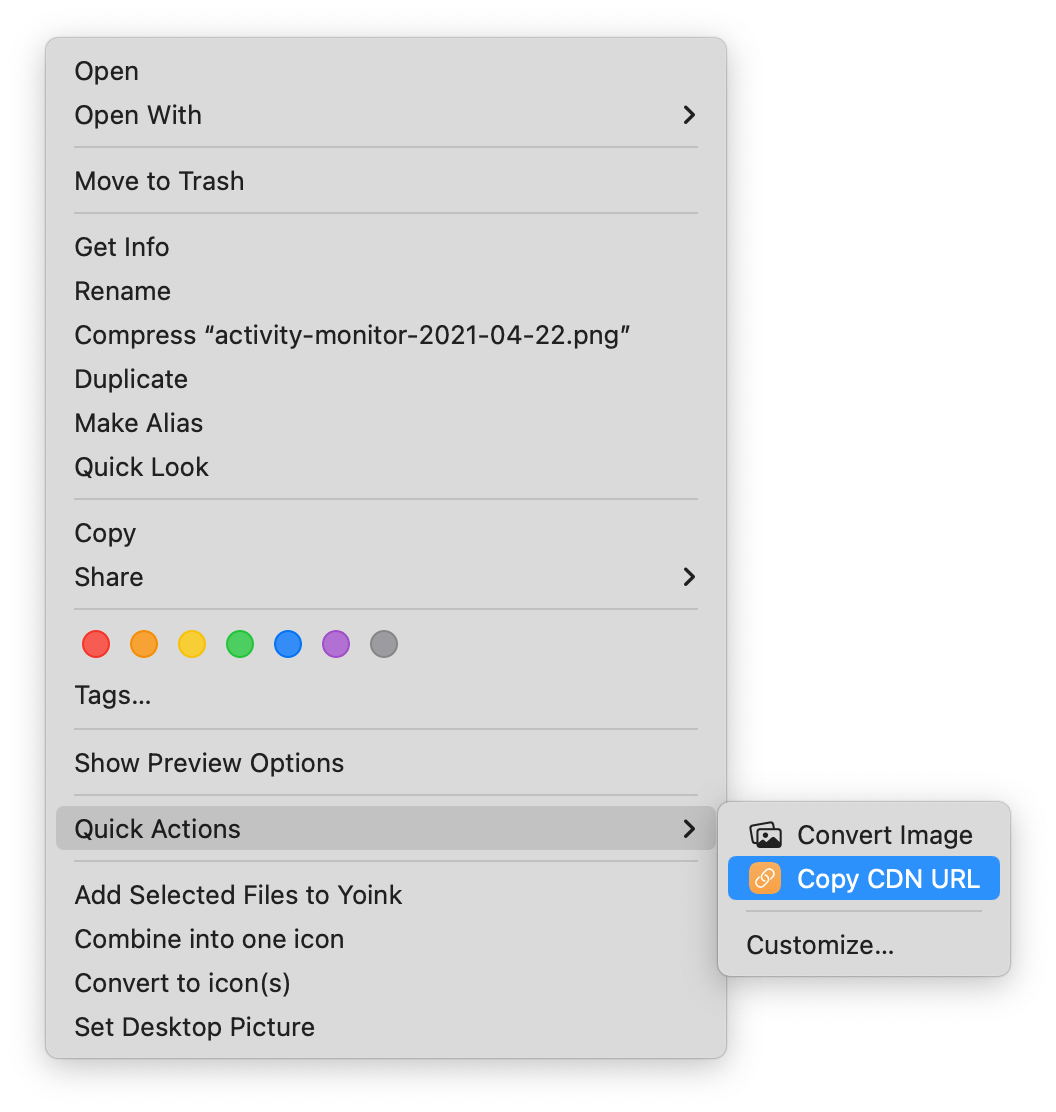
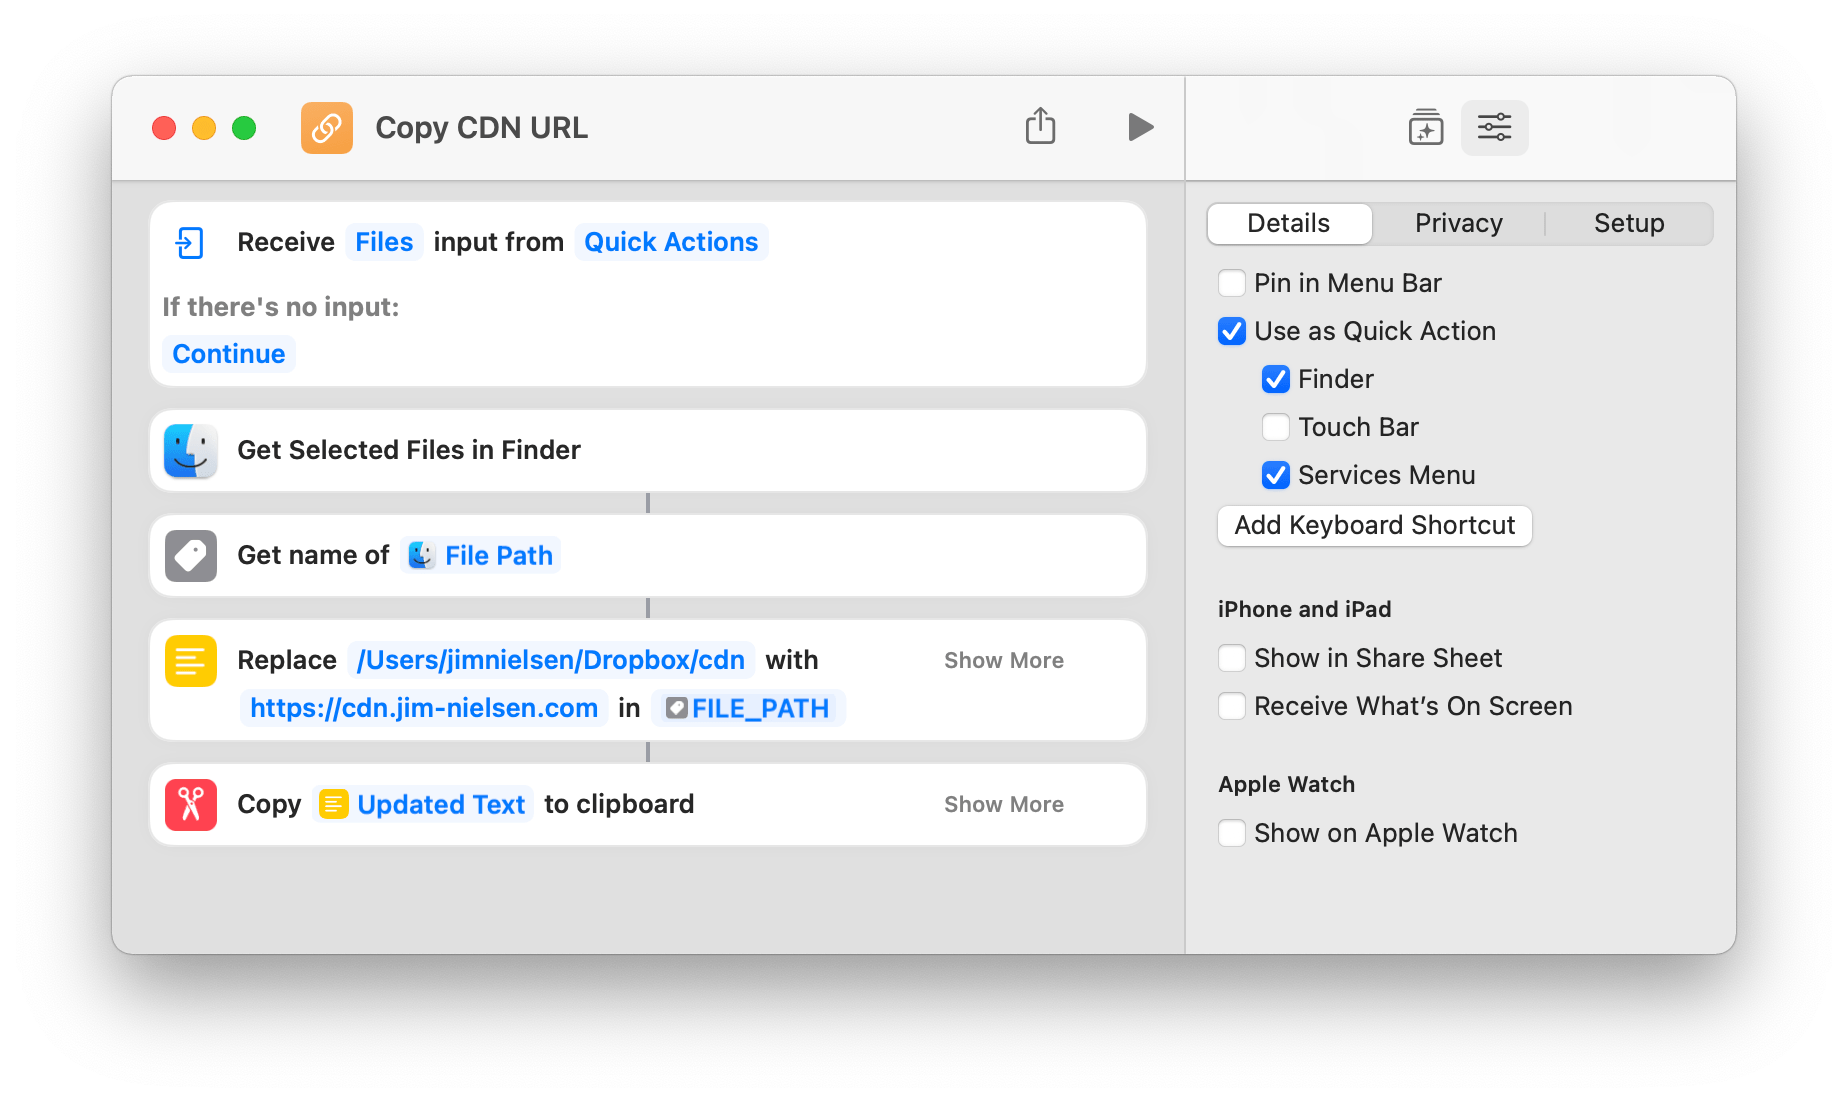
The logic is pretty simple:
- Get the path of the selected file on disk
/Users/Me/Dropbox/cdn-folder/image.jpg
- Replace the local folder’s path with the CDN URL
- Replace
/Users/Me/Dropbox/cdn-folder - With
https://cdn.jim-nielsen.com
- Replace
- Copy the URL to the clipboard
https://cdn.jim-nielsen.com/image.jpg
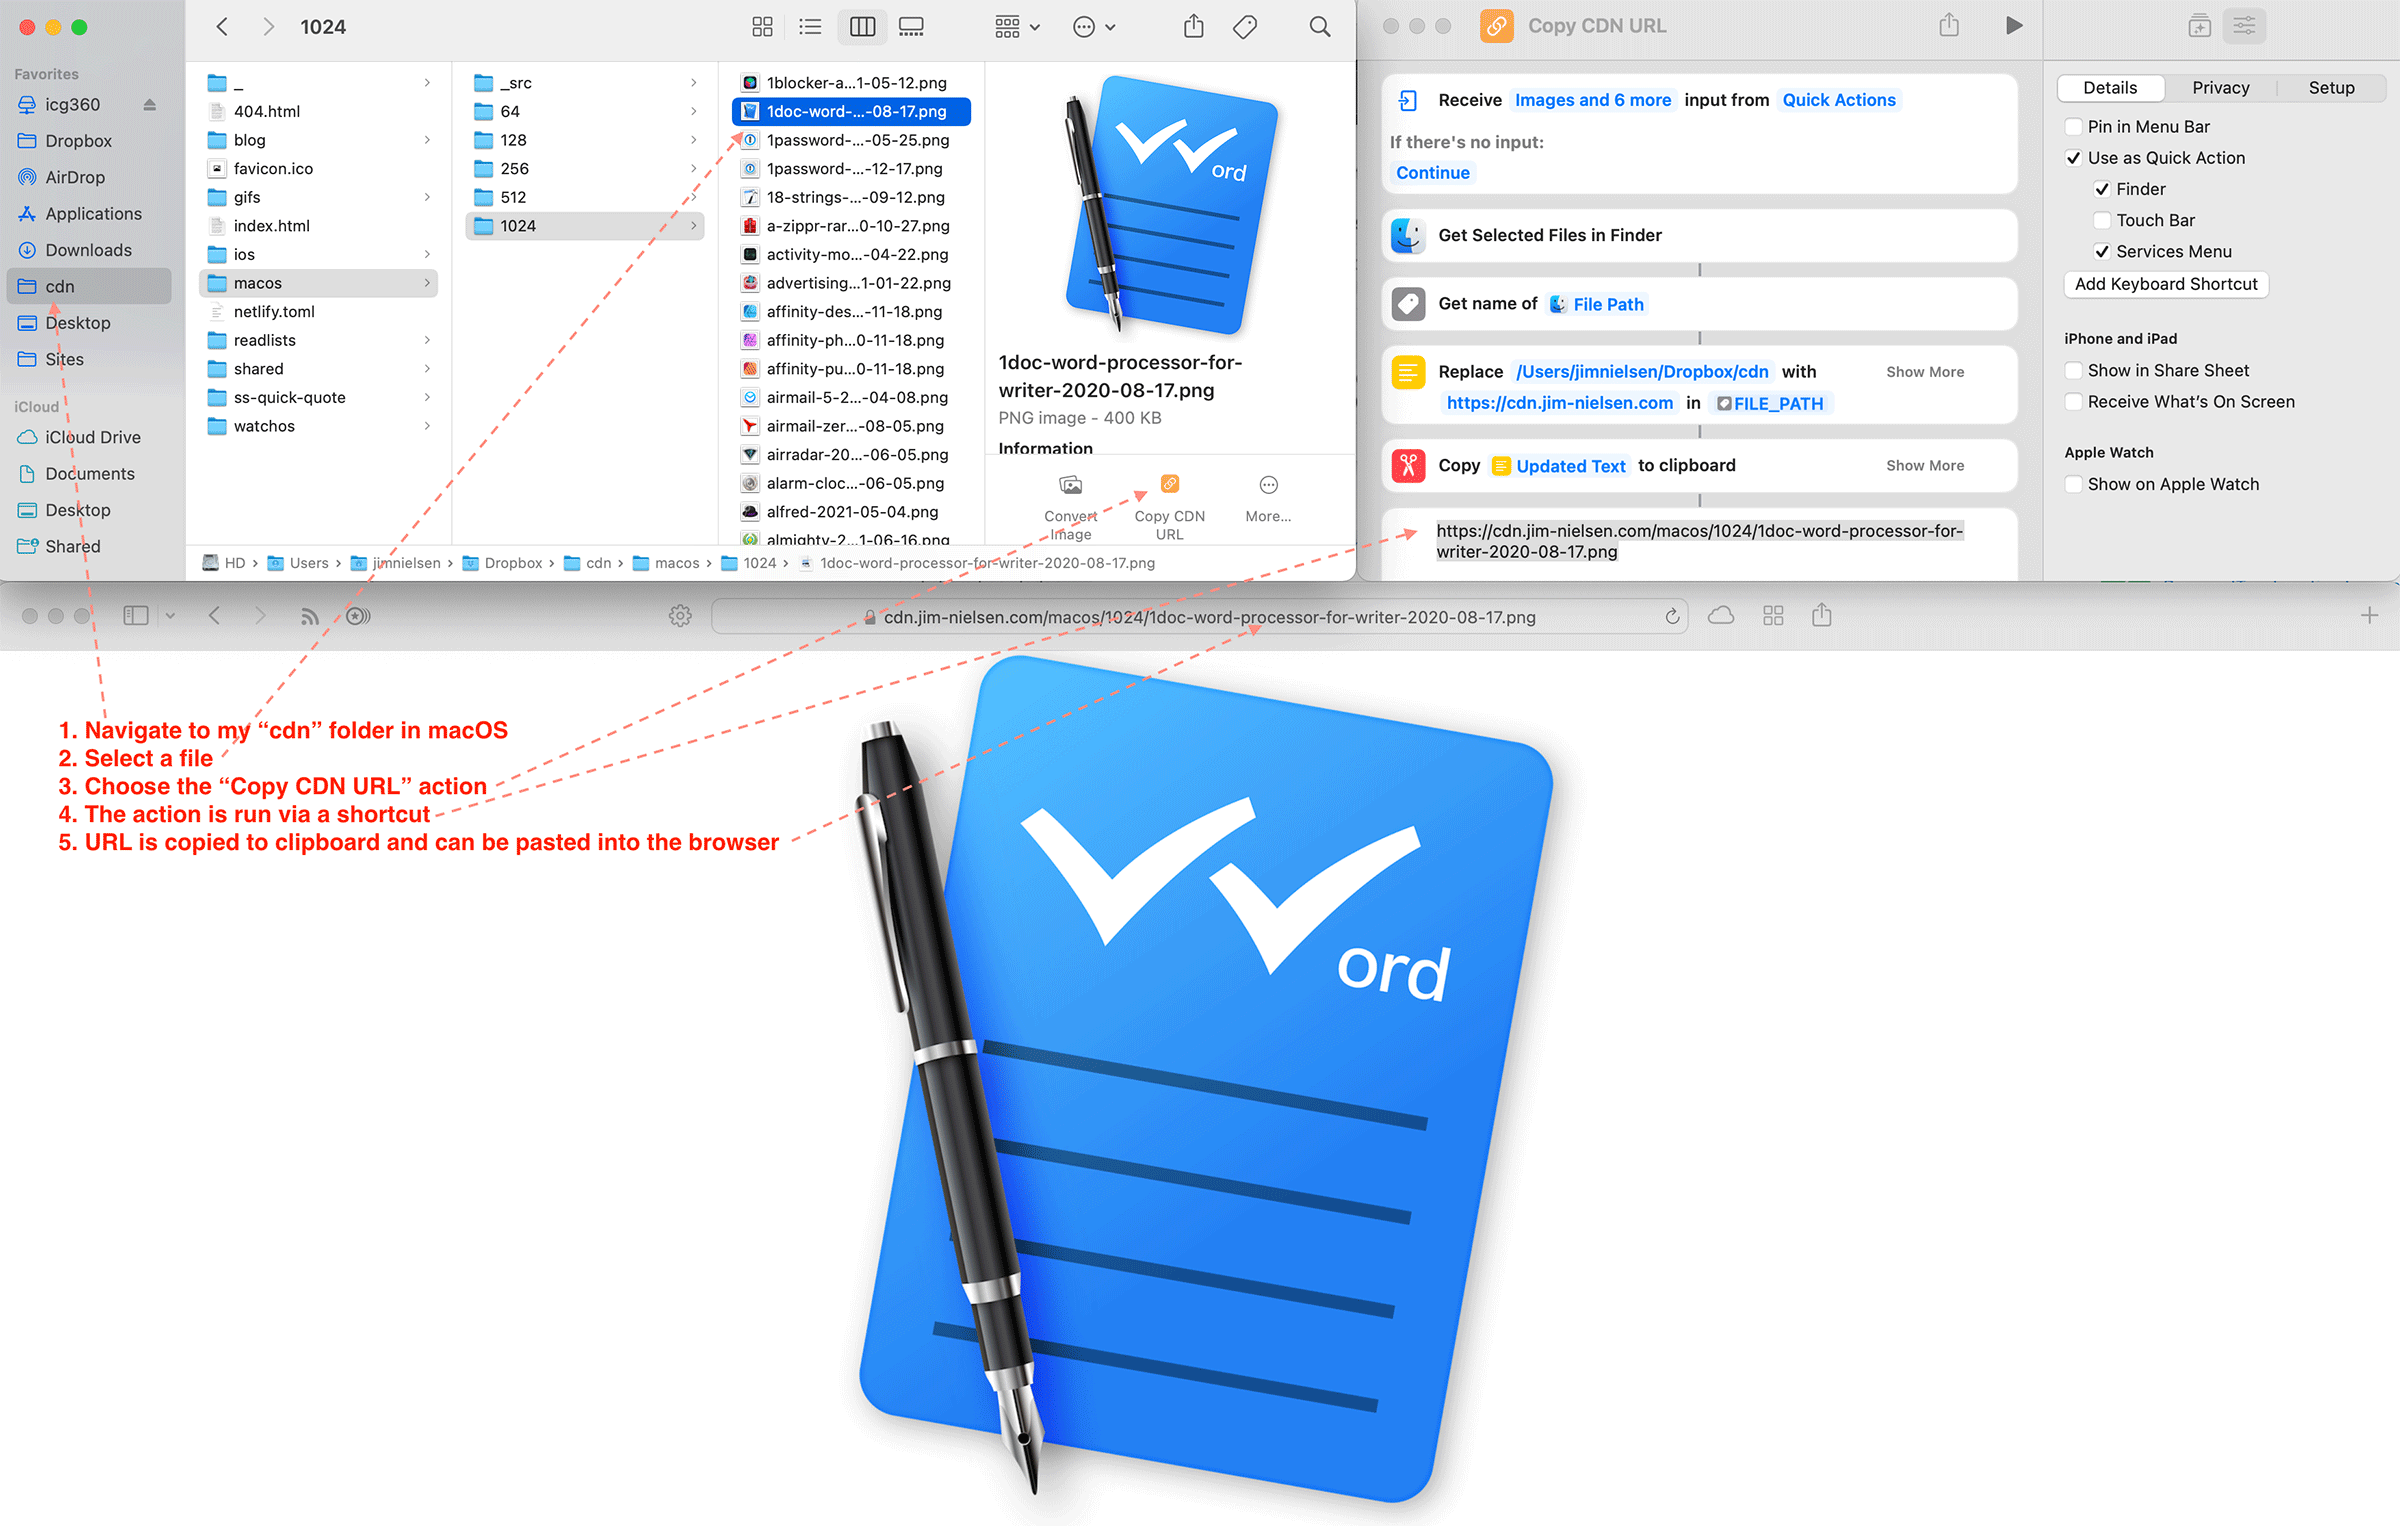
I’m not good with Automator, but I’d always wanted to try Apple’s new Shortcuts for iOS/macOS. After some finagling, I had what a wanted.
Now I drop a file into my local folder, it syncs to Netlify, and a quick command from Finder copies that file’s public URL to my clipboard!
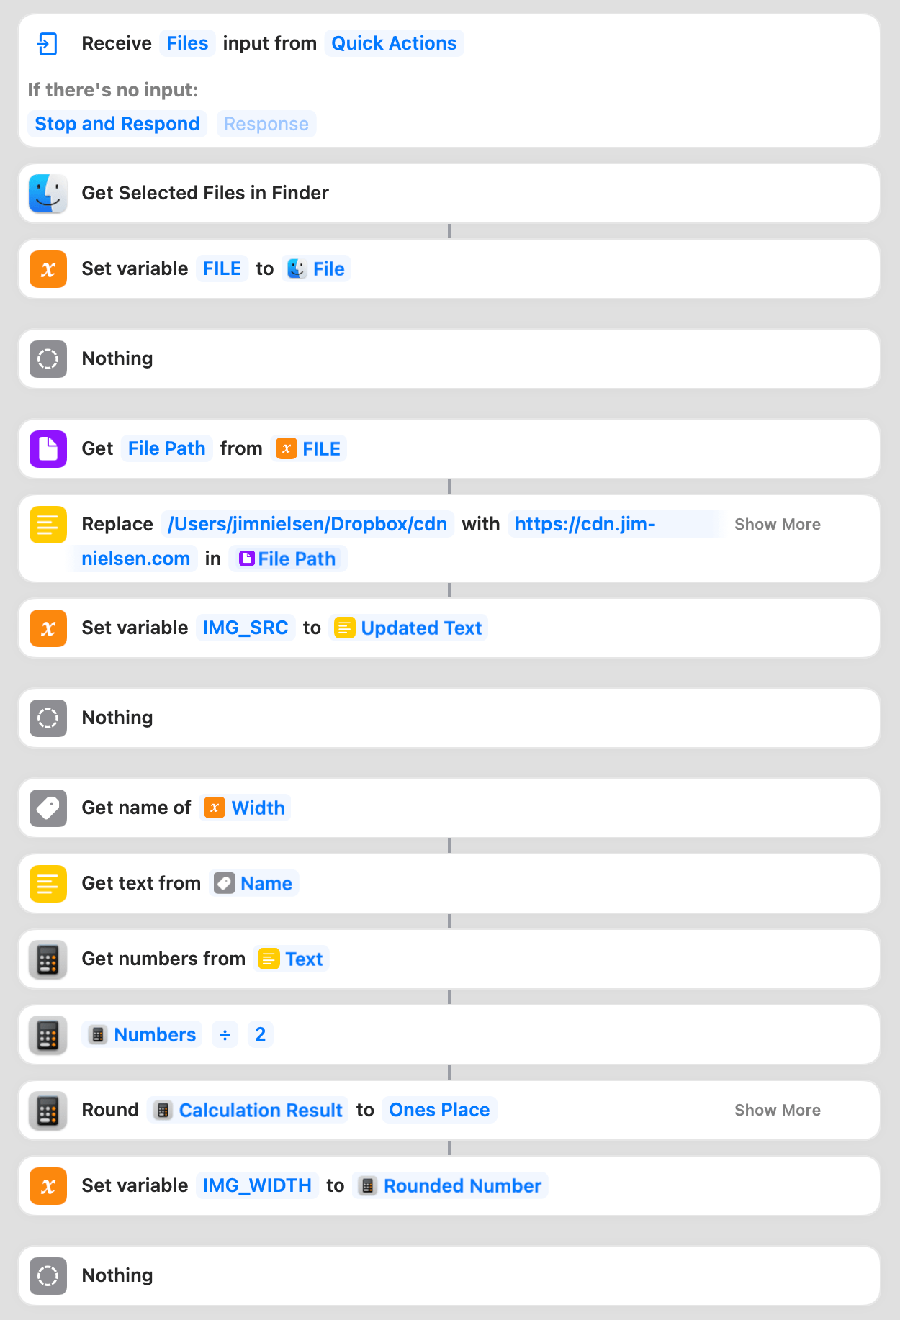
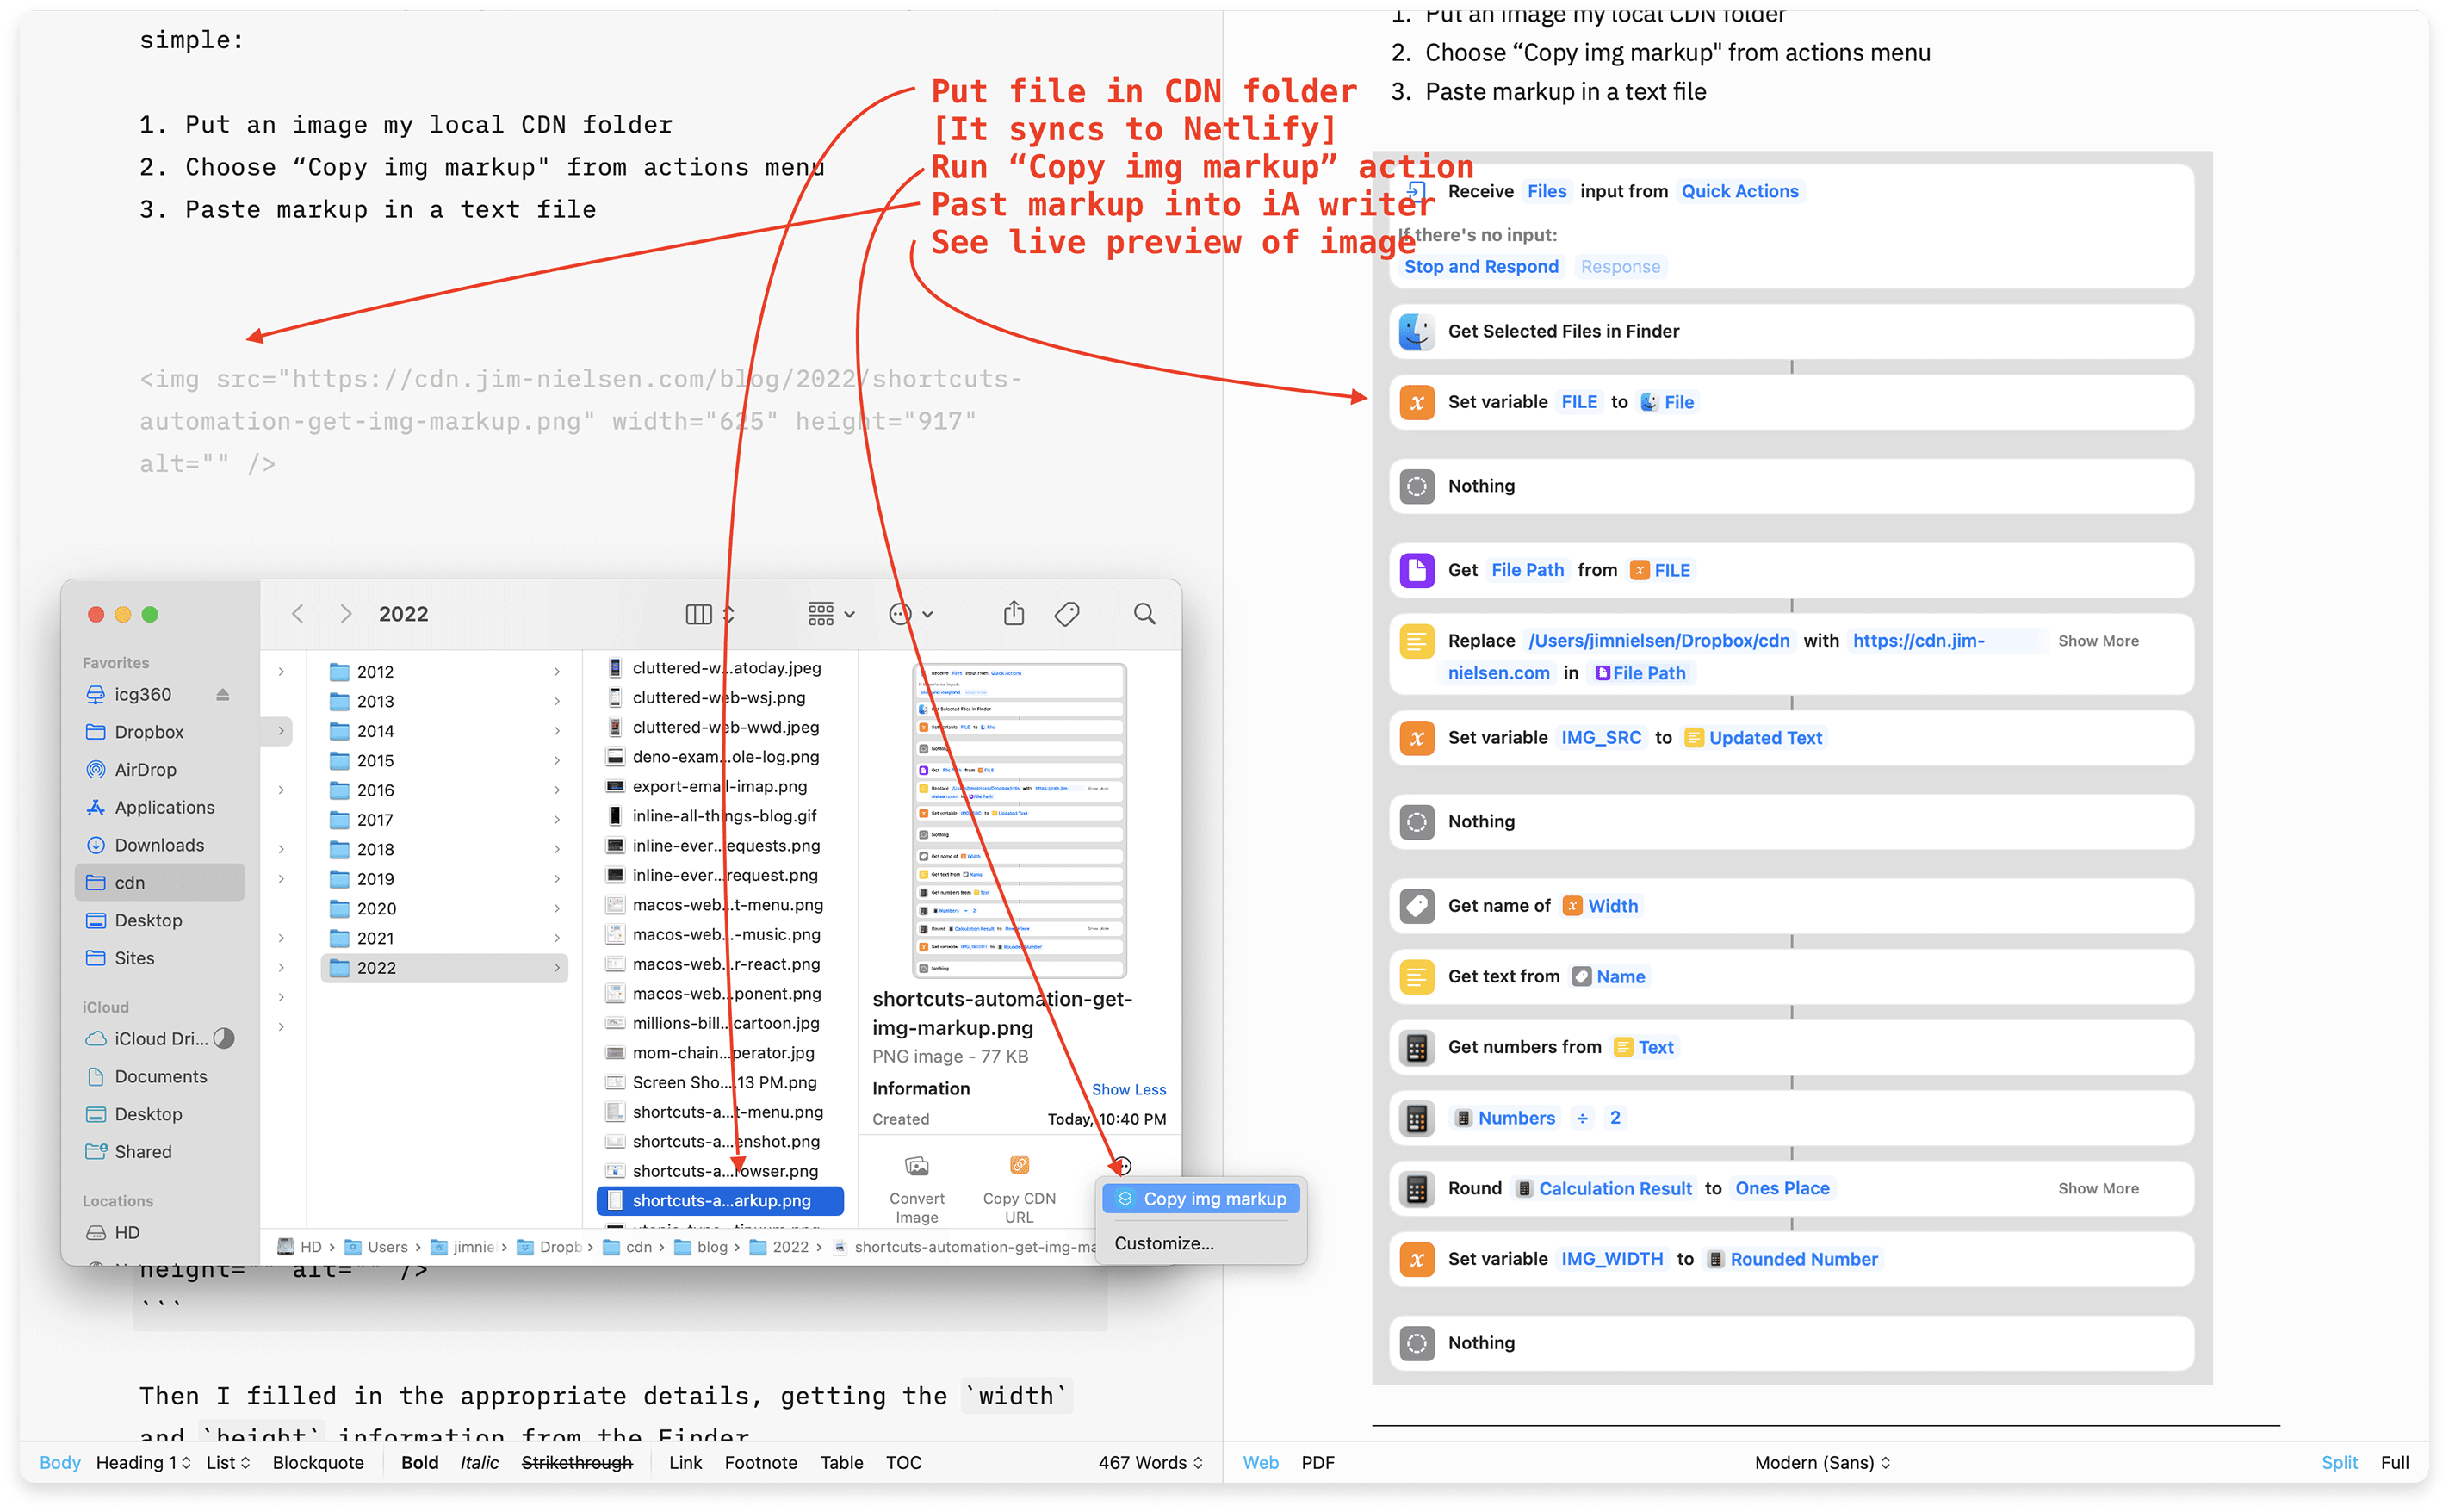
I even took this one step further: I created an action that would not only derive the public URL of a file in my local CDN folder, but it would also retrieve the image’s width and height, divide those values in half (since all my images are optimized for @2x display), and copy the markup for an image with the proper src, width, and height attributes to the clipboard.
This shortcut is more complex, but the logic at play is pretty straightforward. Honestly, I don't know if I’m doing this right in Shortcuts but it works. [Sidenote: trying to Google what you want to do by using the keyword “Shortcuts app” is pretty terrible, as the name is quite generic.] Here’s an example screenshot of my action:
Overall, this makes writing blog posts in markdown with images even more automated for my current workflow:
- Put an image my local CDN folder (it syncs to Netlify)
- Choose “Copy img markup" from actions menu
- Paste markup in a text file
Sure, it’s a bit convoluted. But it works for me.
The idea is as old as FTP but still useful: every file in a local folder syncs to a server with a public-facing URL. With this, every file’s public-facing URL is copy/paste-able via a Finder integration.