Implementation Details of My New Blog Theme
tl;dr wherein I blog about minor design changes to my blog. If you can’t blog about changing your own blog, what can you blog about?
New Colors
My current site’s design is pretty simple. I have one accent color which I use for coloring interactive elements, like links and buttons.
I decided to make that one accent color configurable, allow me to change my blog’s “mood”.
Additionally, I decided to derive the other colors on my site — which were traditionally neutral, like white, black, and gray — as tinged hues of that accent color (similar to what Steve Schooner calls “color grading” in this tweet).
For example: in dark mode, rather than selecting “white” (#fff) for my text color (red line in the graphic below), I select an off-white which contains a bit of the hue from my accent color (green line in the graphic below).
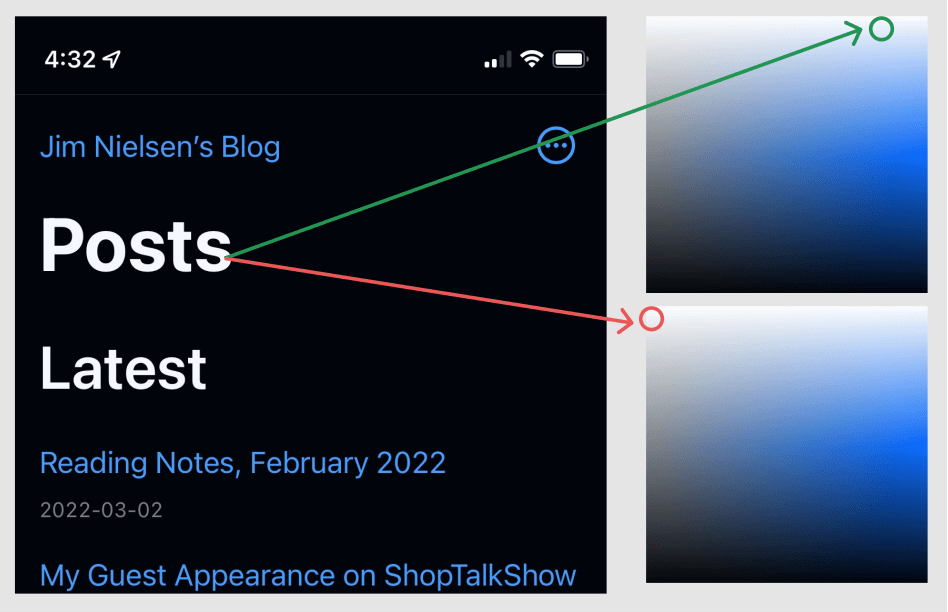
Same idea with the background colors. Rather than pure white or a neutral shade of black, I get a color with a slight hue of my accent color infused.
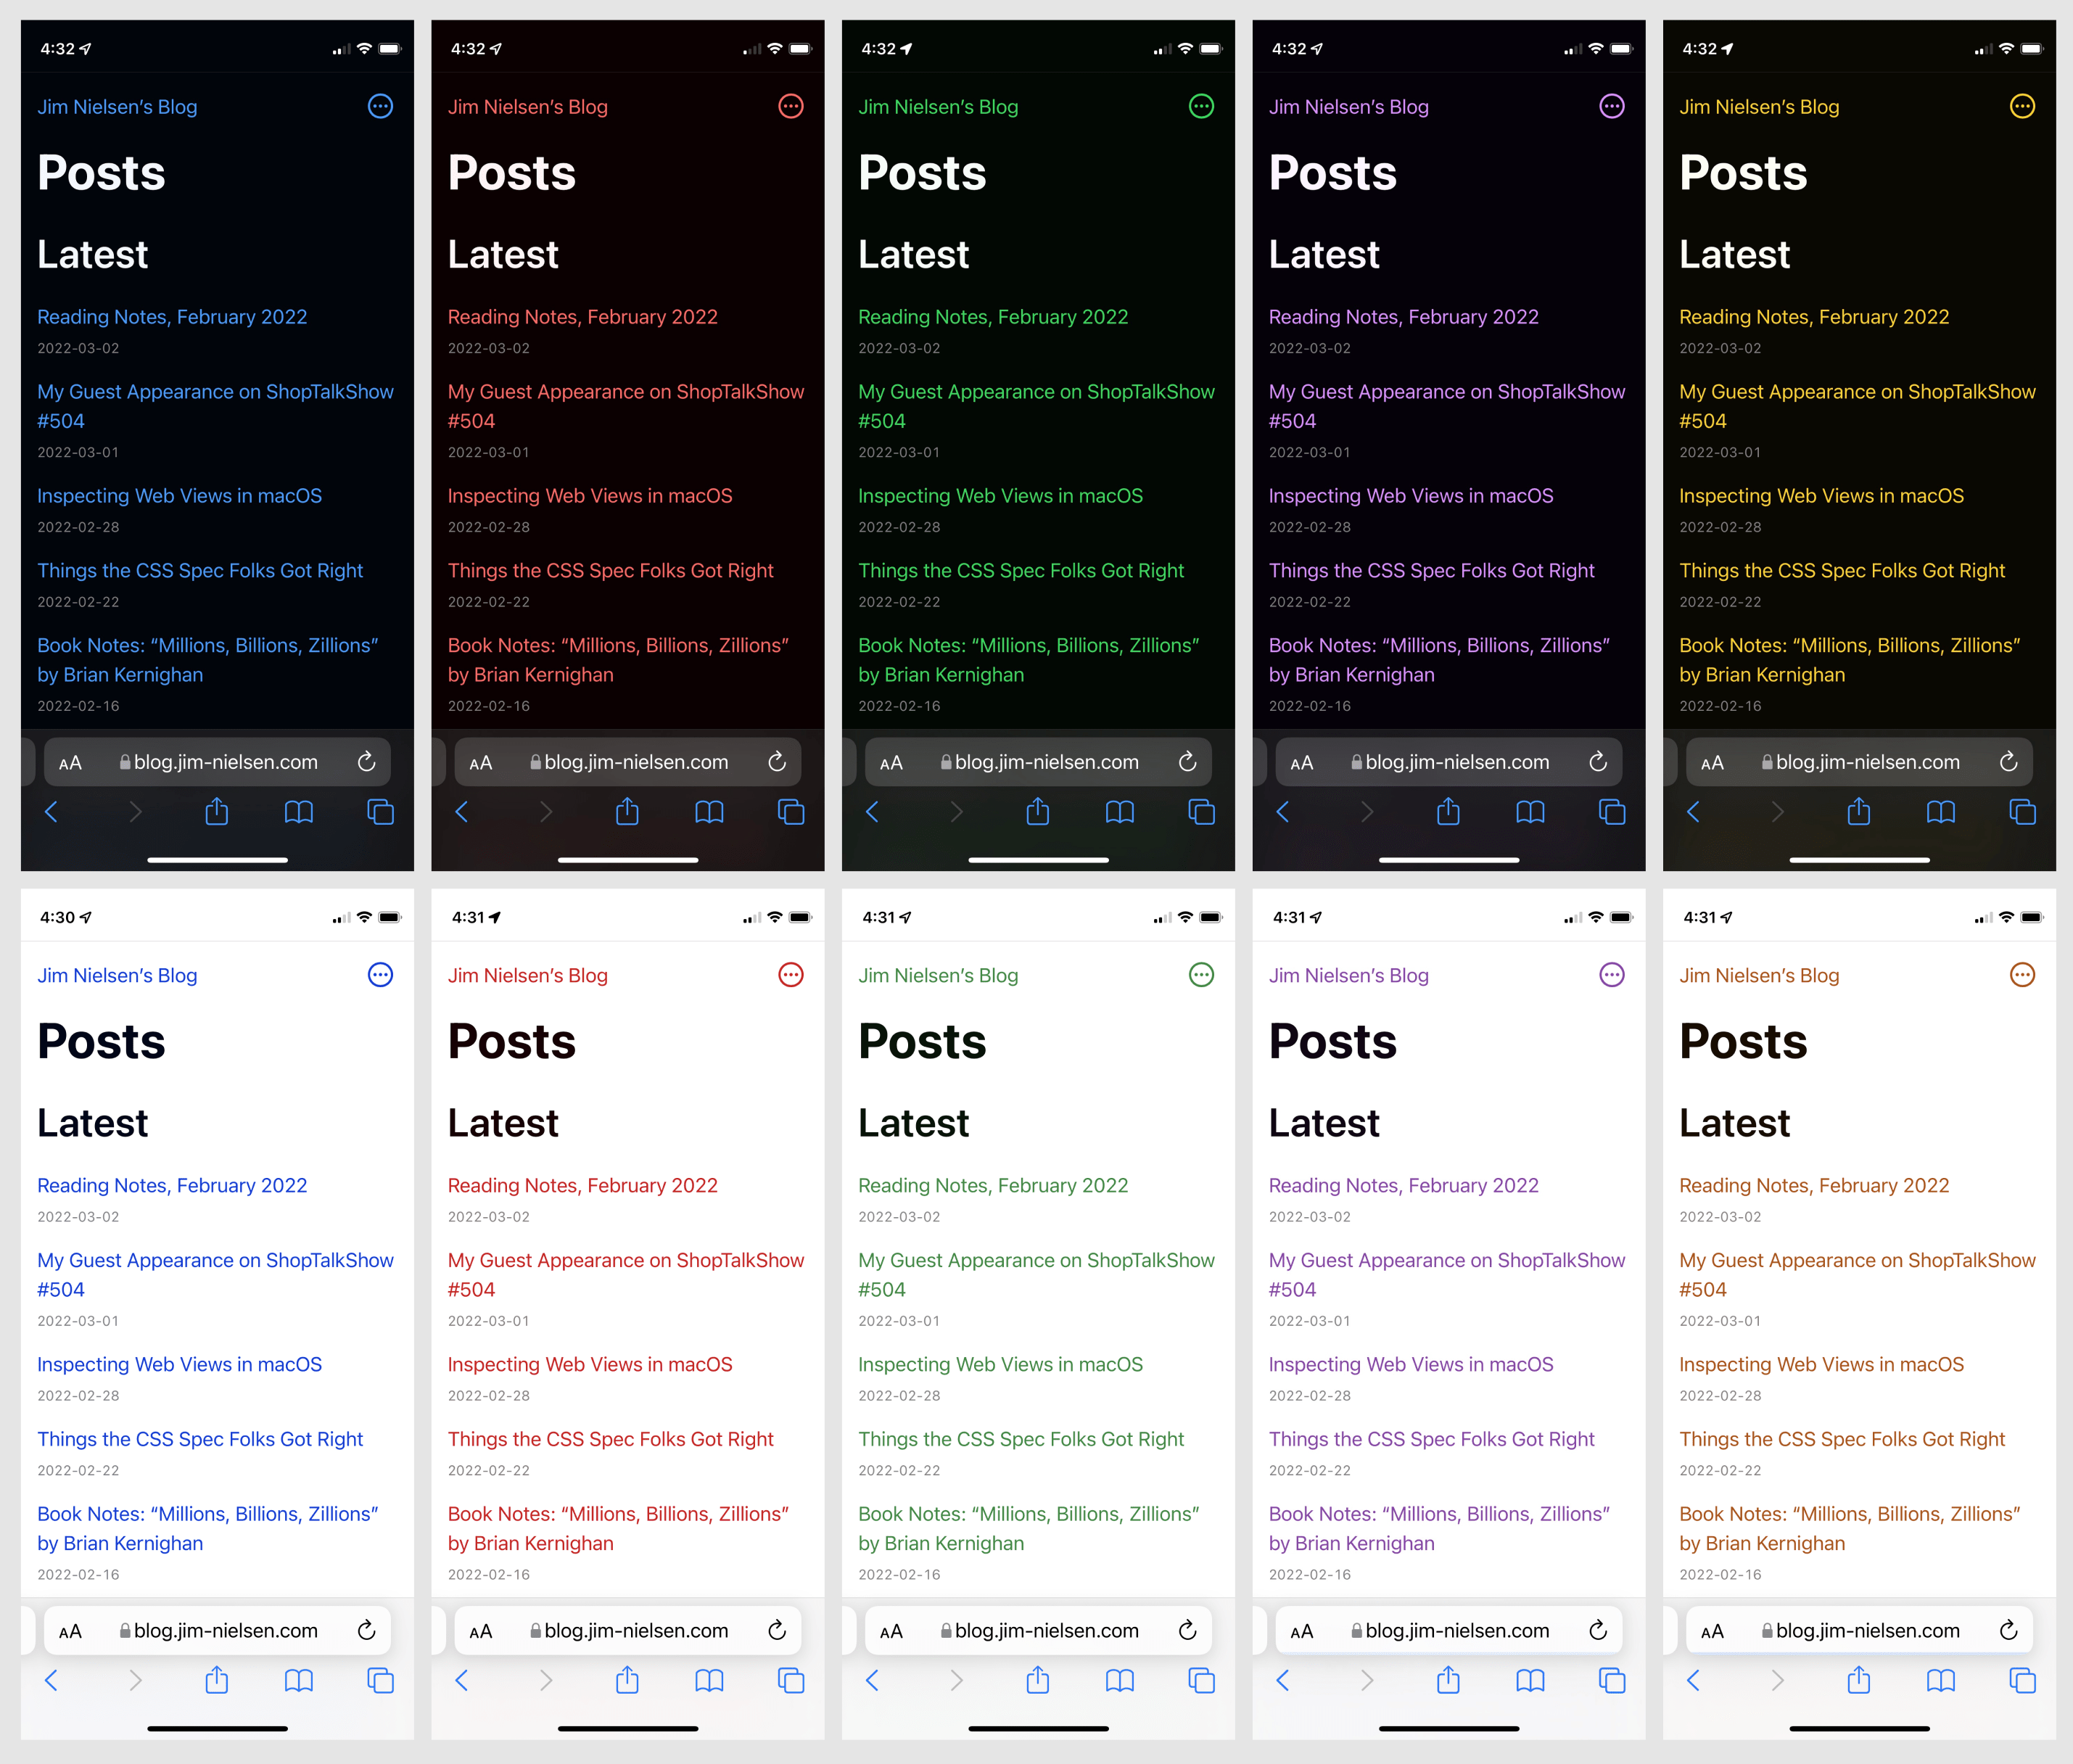
As an example, if you look closely at the image above you’ll notice the black background in each of those screenshots is not the same black. Each black takes on a slight hue of the active theme color. When the accent color is blue, the background is a black with a hue of blue in it.
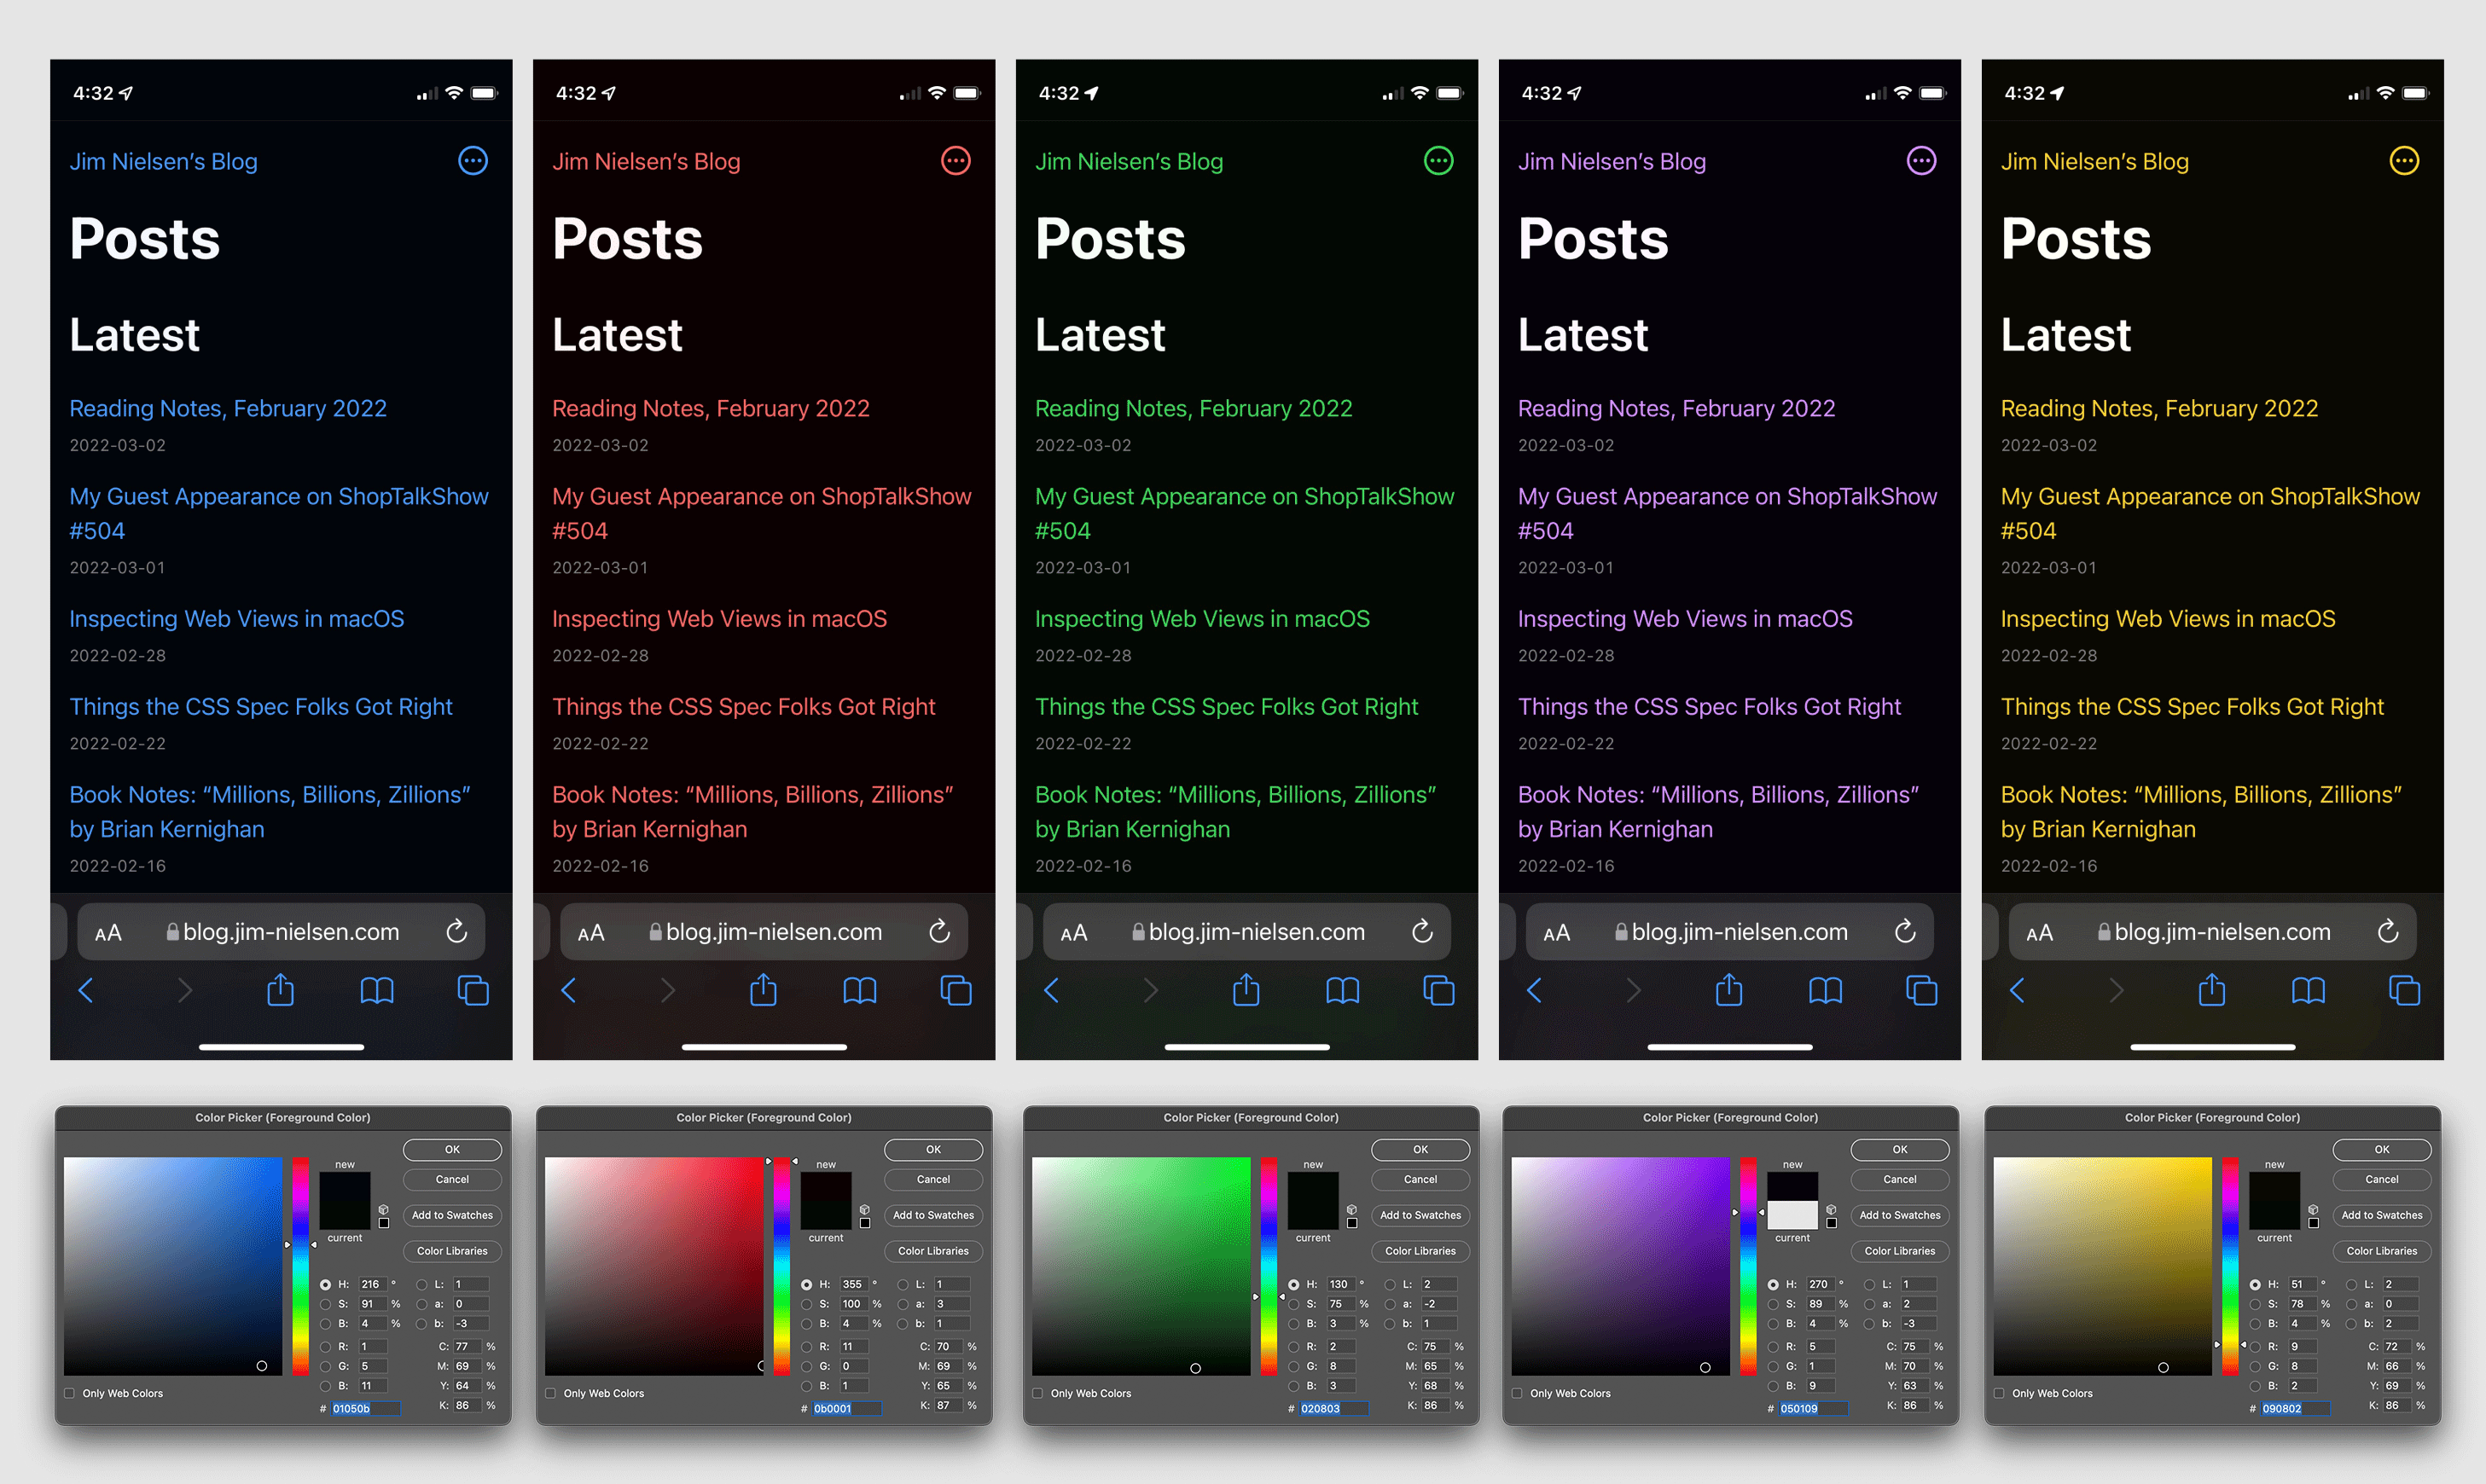
I should clarify: I’m not choosing these graded colors. I choose the accent color (i.e. blue, red, green, etc.) and the other colors are generated in CSS using a combination of CSS variables and calc() (one day CSS relative colors will ship and this more verbose approach won’t be necessary).
To make this work, I declare my colors (i.e. “blue”) in individual HSL parts with light and dark variations of each.
:root {
  --c-blue-h: 223;
  --c-blue-s: 100%;
  --c-blue-l: 43%;

  --c-red-h: 354;
  --c-red-s: 100%;
  --c-red-l: 42%;

  /* more */
}
@media screen and (prefers-color-scheme: dark) {
  :root {
    --c-blue-h: 211;
    --c-blue-s: 100%;
    --c-blue-l: 63%;

    --c-red-h: 3;
    --c-red-s: 100%;
    --c-red-l: 69%;

    /* more */
  }
}
Then I have a theme color, also defined in HSL parts, which maps to one of my defined colors (these are the values JavaScript changes dynamically when the user selects a color).
:root {
  --c-theme-h: var(--c-blue-h);
  --c-theme-s: var(--c-blue-s);
  --c-theme-l: var(--c-blue-l);
  --c-theme: hsl(var(--c-theme-h) var(--c-theme-s) var(--c-theme-l));
}
For color grading, like my background colors or text, I use the individual H and S values, but set the L value myself (or via a calc() function).
:root {
  --c-bg: hsl(var(--c-theme-h) var(--c-theme-s) 100%);
  --c-text: hsl(var(--c-theme-h) var(--c-theme-s) 5%);
}
@media screen and (prefers-color-scheme: dark) {
  :root {
    --c-bg: hsl(var(--c-theme-h) calc(var(--c-theme-s) - 20%) 2%);
    --c-text: hsl(var(--c-theme-h) var(--c-theme-s) 98%);
  }
}
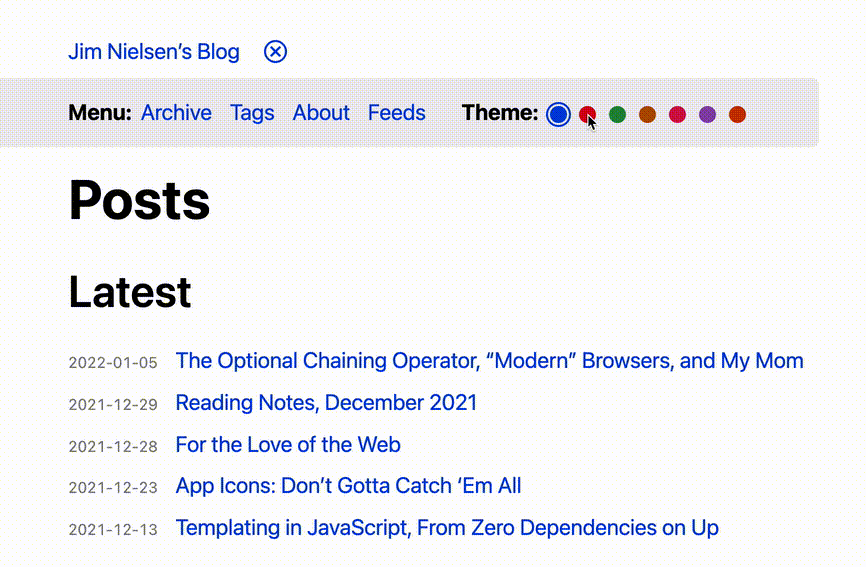
With a sprinkling of client-side JavaScript, I can set a theme color from one of my pre-defined (accessible) color choices.
It’s not much, but it’s mine. And I like it—for now.
Site Navigation as a Web Component
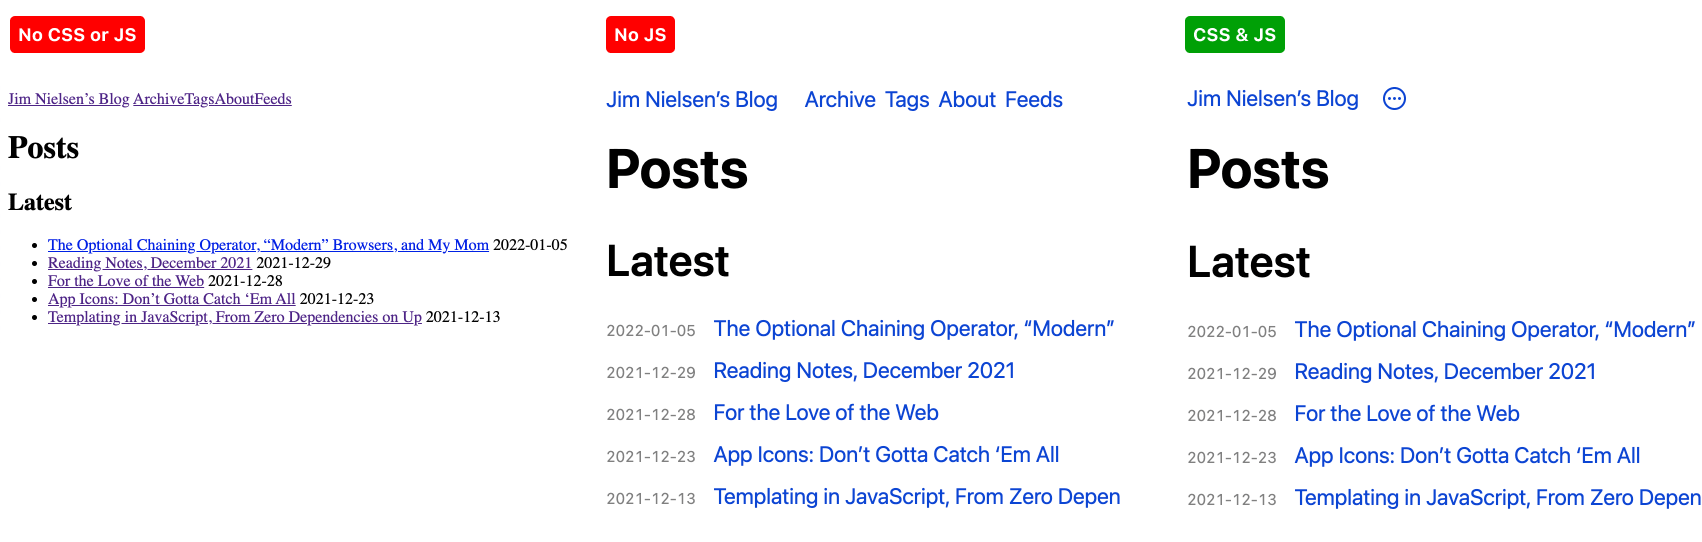
The navigation, which the color picker is a part of, is all setup as a progressively-enhanced web component.
Why? Because the color picker requires JavaScript to work but the navigation doesn’t.
The initial payload is a set of links inside a custom element.
<site-nav>
  <a href="...">Jim Nielsen’s Blog</a>
  <a href="...">Archive</a>
  <a href="...">Tags</a>
  <a href="...">About</a>
</site-nav>
<script>/* my web component code here */</script>
This ensures the basic functionality of the site works, with or without JavaScript. The web component then takes those links and combines them with the markup required to render an interactive color picker and collapsible site navigation.
In this way, the site can be navigated with or without JavaScript. If JS fails for any reason, the collapsible navigation and color theme switcher won’t work. That’s ok, they’re nice-to-haves but not essential to reading content on my blog.
The navigation didn’t have to be a web component. It could’ve been done in a number of ways. But it was kind of fun to try the web component approach.
The essence of the web component looks like this (code simplified for illustration purposes, see the full code on GitHub):
class SiteNav extends HTMLElement {
  constructor() {
    super();

    // Get the links from the initial HTML

    // Enhance the component
    this.innerHTML = `
      <button>Expand/collapse</button>

      <nav>
        ${linksFromOriginalHtml}
      </nav>

      <form>
        ${myColors.map(color => `
          <label
            <input
              type="radio"
              name="color"
              value="${color}"
            />
          </label>
        `).join("")}
    `;
  }

  connectedCallback() {
    // Add JS to control the expand/collapse of the menu
    // Add JS event handler to control the color picker
    //   and fire _setColor()
  }

  _setColor(newColor) {
    // Set theme custom properties with the new color, i.e.
    document.documentElement.style.setProperty(
      `--c-theme-h`,
      `var(--c-${newColor}-h)`
    );
    document.documentElement.style.setProperty(
      `--c-theme-s`,
      `var(--c-${newColor}-s)`
    );
    document.documentElement.style.setProperty(
      `--c-theme-l`,
      `var(--c-${newColor}-l)`
    );
  }
}
What’s cool is how you can put the essential information in the initial HTML document and then enhance from there. If a less capable browser loads this page, the navigation works perfectly fine because <site-nav> is, by default, merely a set of links.
Part of me is [dog at keyboard “I have no idea what I’m doing”] here, but hey, that’s what a blog is for: trying and learning new things and writing about it to understand your shortcomings.